Showing posts with label Vine. Show all posts

Monday, February 1, 2016

How to remove viber account permanently

How to remove viber account permanently

 Image result for How to delete viber account
The instructions to delete viber account, follow these steps:
  1. From your viber MENU, click on More Options.
  2. Then select Settings
  3. From Settings go to Privacy 
  4. Then click Deactivate Account button
Delete Viber Account
Note that, once your Viber account is deactivated, it can not be restored and you will lose all your information including photos, messages etc.
The last step will be to uninstall viber app from your device.

OR 

How to remove your Viber account

Viber for iOS teaser 002
Our previous tutorials have taught you how to delete a WhatsApp account, as well as your Facebook and Instagram account, along with any underlying user data. But we understand that not everyone is a fan of Facebook-owned services.
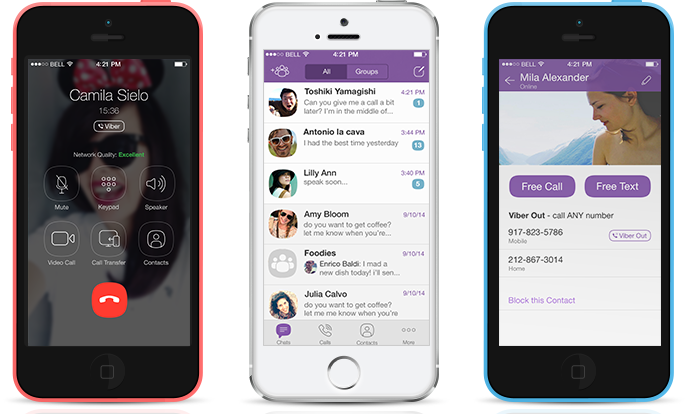
For instance, some people prefer Viber for their instant messaging needs. Those pondering leaving Viber might be wondering if they can deactivate their account and delete their data.
In a word, yes. In this tutorial, we’ll tell you everything there’s to know pertaining to deleting a Viber account, guide you through the account deactivation process and inform you what happens to your data after the account is killed.

Deleting Viber vs deactivating account

Keep in mind that simply removing the Viber app from your device is not the same as deactivating your account. But if you do delete the Viber app, the following will happen:
  • Your Viber address book gets removed from the servers after 45 days.
  • Your phone number, which is your Viber account number, will be decoupled from the service after one year of inactivity.
To instantly deactivate your Viber account, follow the steps outlined further below.
Deactivation of a Viber account can only take place within the application itself. If you have already uninstalled Viber and would like to deactivate your account, you will need to re-install Viber in order to do so.
Ensure that you have the latest version of Viber for iOS or Viber for Mac prior to deactivating your account.

What happens after I deactivate my Viber account?

This is what happens after you deactivate a Viber account on your device:
  • All of your data is cleared on this device, including your call and message history, groups and downloaded stickers, both free and purchased.
  • You will no longer appear as a Viber user to your Viber contacts.
  • All other accounts linked to your Viber account, like Twitter, Facebook and so forth, will be unlinked from the service.
  • Any purchased Viber Out credit will remain on this account, but you can contact Viber support via email and request a credit transfer to a new Viber account.
  • When you deactivate Viber on your primary device (the one on which you registered with the service), the app will be deactivated on all other devices.
IMPORTANT: Once your account is deactivated, there is no way to restore any of your user data. Viber does not store any of your message history and is unable to retrieve lost data. Re-registering to Viber with the same mobile phone number will not restore the previous account history.

How to back up your Viber chats

In order to create a full backup of your chat history prior to deleting your Viber account, follow the steps outlined right below:
Step 1: Launch Viber on your iPhone.
Step 2: Tap on More in the tab area alongside the bottom.
Step 3: Select Settings to access options.
Step 4: Choose Calls and Messages.
Step 5: Select Email message history.
This will bring up the mail compose sheet. Type in your own email address in the TO: field and tap Send to send yourself the attached ZIP file containing Viber’s message history.
IMPORTANT: Your backed up history is provided for your convenience and cannot be restored onto this or another device. Messaging history backup is available on Android and iPhone only.

How to deactivate your Viber account on mobile

Step 1: Launch Viber on your iPhone.
Step 2: Tap on More in the tab area alongside the bottom.
Step 3: Select Settings to access options.
Step 4: Choose Privacy.
Step 5: Select Deactivate Account.
Viber deactivate account iPhone screenshot 001
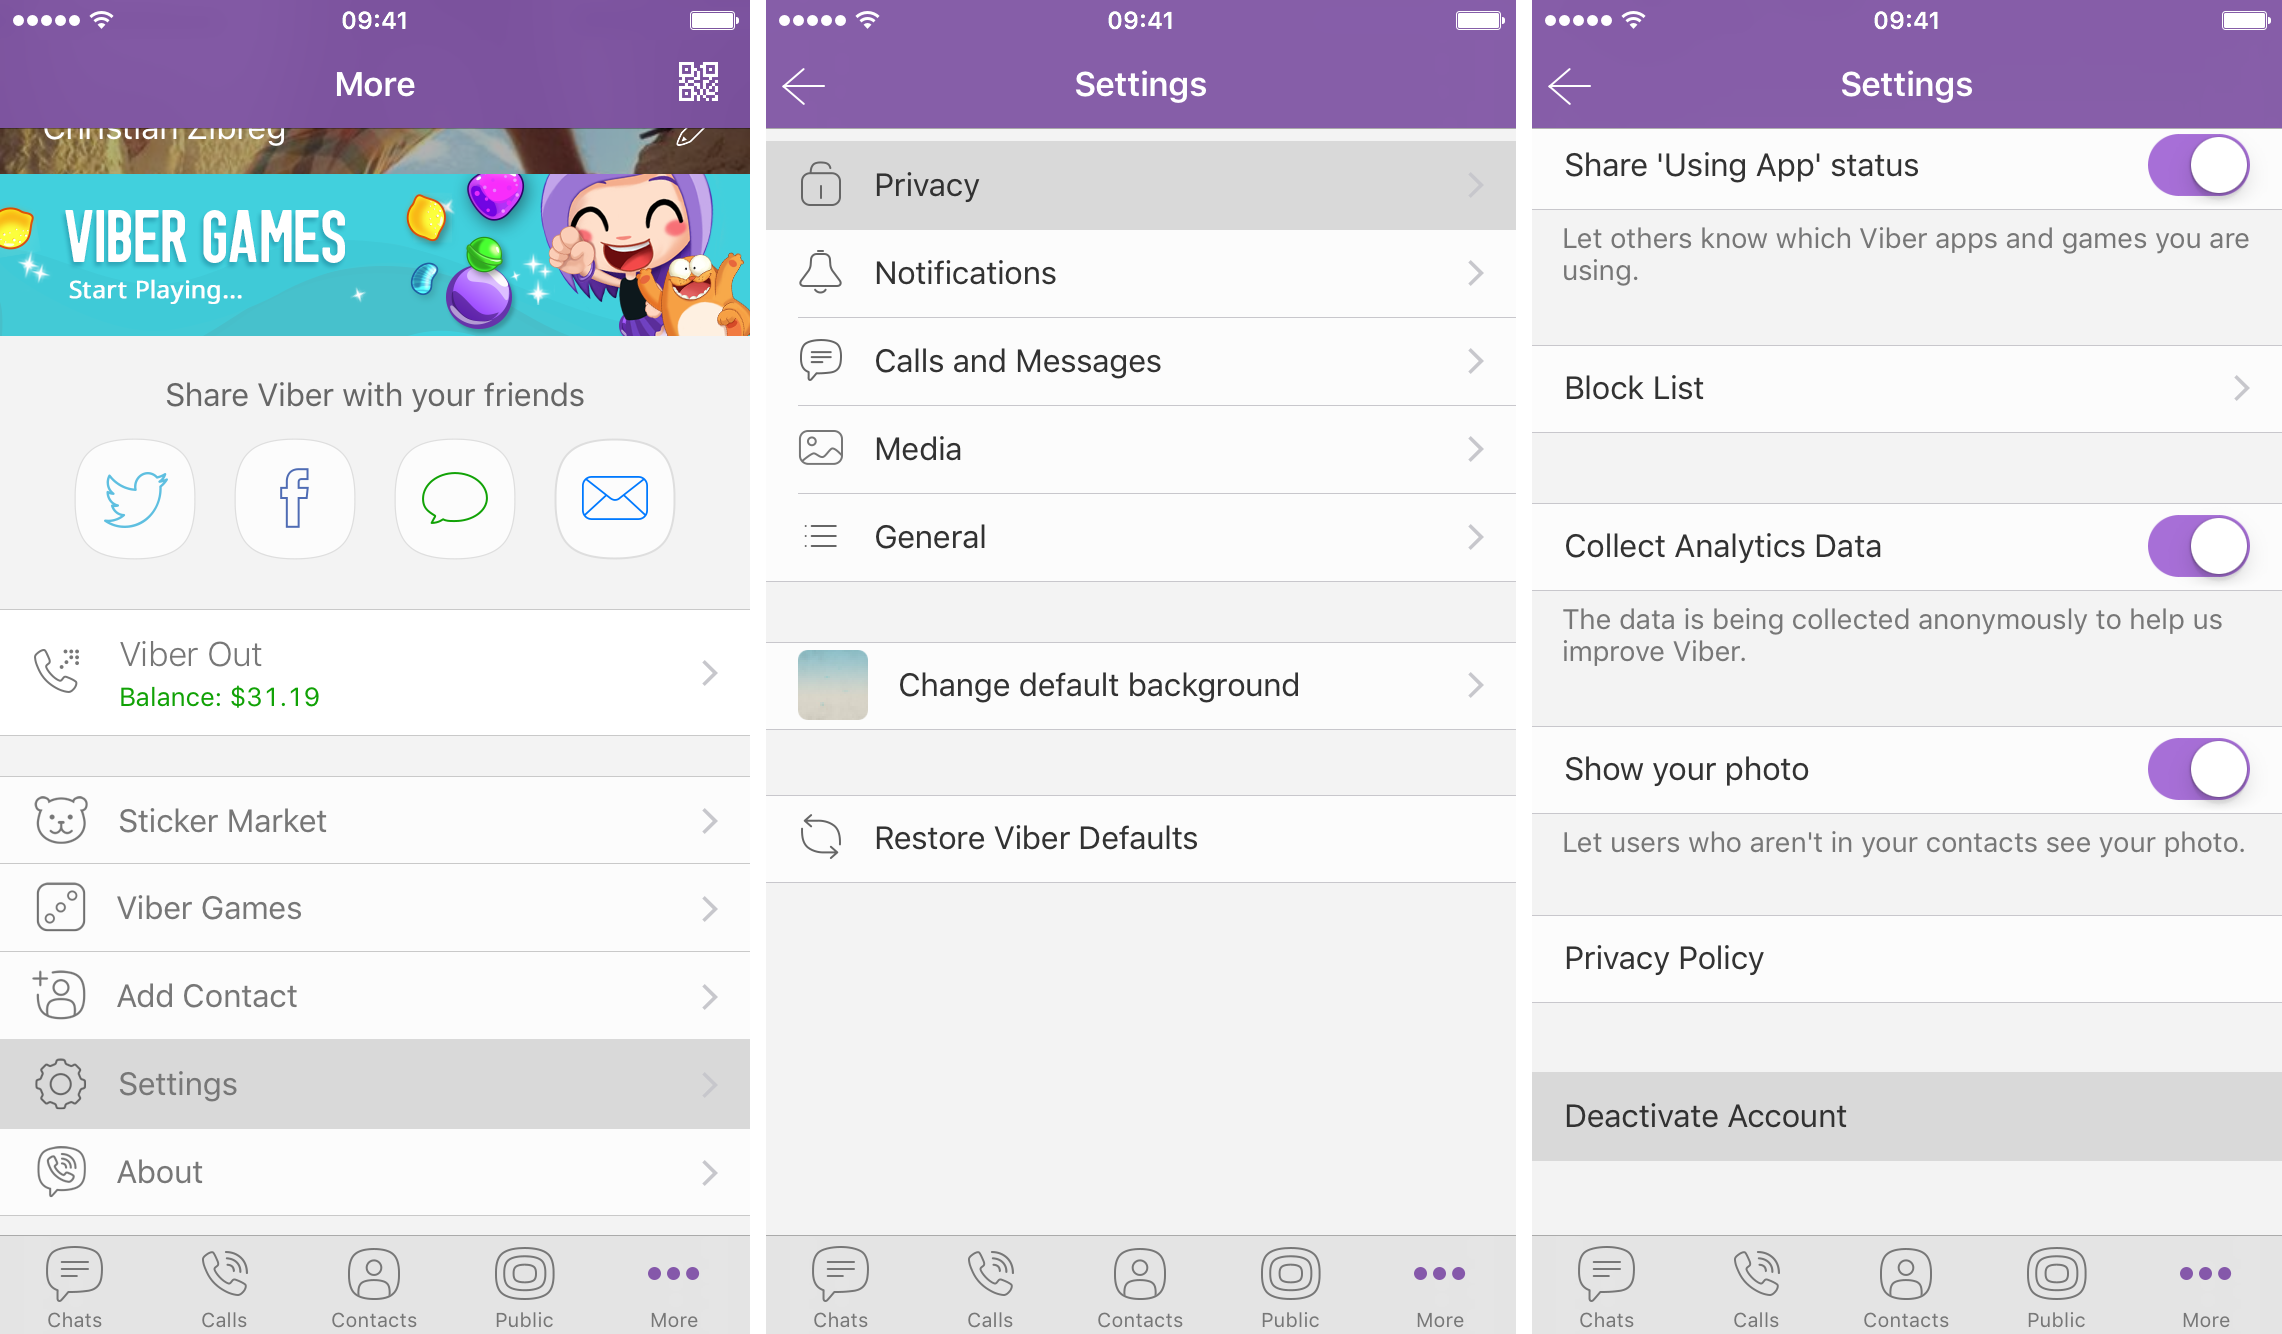
You will be warned that continuing with the deactivation process will clear all of your data on this device and deactivate Viber on all your other devices.
Step 6: Tap Deactivate to proceed.
You can now delete the Viber app from this device.

How to deactivate your Viber account on desktop

Step 1: Launch Viber on your Mac, Windows or Linux PC.
Step 2: Choose Preferences in the Viber menu (Mac) or click the settings icon at the bottom left of the screen (Windows/Linux).
Step 3: A new window will pop up. Choose the Account tab to continue.
Step 4: Now select Deactivate Viber.
Viber deactivate account Mac screenshot 001
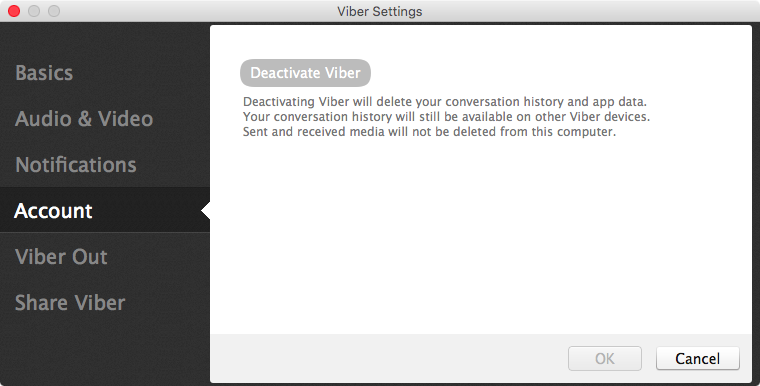
Step 5: If you are sure that you would like to proceed, choose Deactivate.
Viber deactivate account Mac screenshot 002
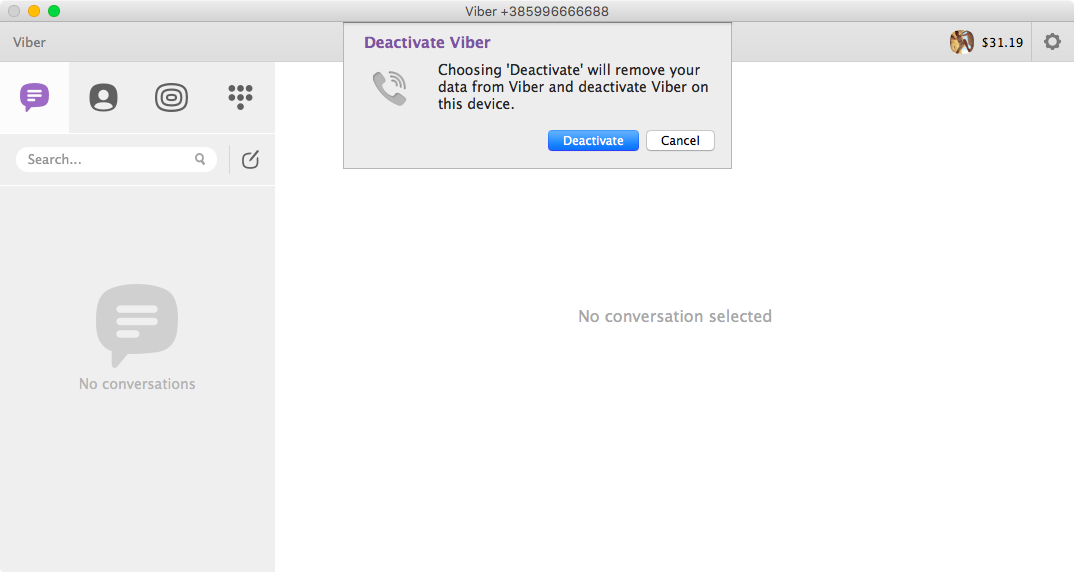
This will remove all of your data and deactivate Viber from your desktop only.
You can now drag the Viber app from your Mac’s Applications folder into the Trash. Viber will remain active on your primary device (your iPhone) so you’ll need to deactivate the app there, too.

How to reactive your Viber account

Step 1: Download and launch Viber on your iPhone.
Step 2: Follow the on-screen instructions to re-register your mobile phone number with the service. This will reinstate the previous account on your new device. Your message and call history will not be restored.

Friday, January 29, 2016

Block unwanted users on Vine

 Image result for how to delete vine account
If you’re a Vine fan, chances are you have, or will encounter unwanted comments on the videos you post to the service. This can be especially worrisome if your vines are set to public, as anyone can read NSFW language in comments.
Of course, you can delete comments posted through Vine’s iPhone app at any time. But if someone is repeatedly showing abusive behavior toward your followers and spamming you in comments, you should block them.
Though this won’t block the user from commenting on your posts when they’re viewed through searches or hash tags, it will prevent them from following or messaging you on Vine. In this post, you are going to learn how to block a user on Vine, report abusive behavior and flag sensitive media.

How to block a Vine user

Option one: Launch Vine’s mobile app on your iPhone.
Option two: Navigate to a user’s profile or one of their posts.
Option three: Tap the ellipsis icon in the upper right and select Block or report.
Option four: Now select Block in the menu and tap the Block button at the bottom.
How to block or report Vine iPhone screenshot 001
This prevents the user from following you, viewing your profile and messaging you.
However, they will still be able to view and comment on your videos that appear in popular results for search tags. To report unwanted comments or abusive behavior, follow the instructions below.

How to report abuse and flag posts on Vine

Option 1: Launch Vine’s mobile app on your iPhone.
Option 2: Navigate to sensitive content that you wish to flag for review.
Option 3: Hit the ellipsis icon below the post and select Block or report.
Option 4: Now select File a report in the menu and select why you wish to flag this post.
Pre-populated entries include “I’m not interested in this Vine”, “It’s spam”, “It’s explicit, graphic or sexual content” and “It’s abusive or harmful.”
Vine may add or remove these entires in the future.
Option 5: Tap the Report button at the bottom.
How to block or report Vine iPhone screenshot 002
Doing so will prompt Vine’s editorial team to review reported content.
If the review process determines that the media in question is indeed sensitive, Vine users will be required to click through a warning message before media is displayed to them.

How to remove Vine Account

How to delete vine account?
 Vine logo green medium

I think you’ll agree with me that Vine has become quite a phenomenon. A short-form video sharing service owned by Twitter, Vine is the place where many people go to share and watch six-second looping video clips, some of which are quite amusing and engaging.
But if you’ve watched one too many vines and have decided that you won’t be active on the service going forward, it might be a good idea to deactivate your account.
In this post, you’ll learn how to deactivate your Vine profile through the mobile app and permanently delete all its underlying data.

About account deletion

After you successfully deactivate your Vine account using the steps outlined in the following section, your profile data and content will live on Vine’s servers for a period of 30 days, hidden from public.
This grace period lets you reactivate your account by logging into Vine’s mobile app or website at any time within the 30-day timeframe. To have your account and its underlying data permanently deleted from Vine’s servers, avoid logging into Vine during that period.
If you don’t log in to Vine for more than 30 days after deactivating it, all your content along with your profile will be deleted for good and Vine won’t be able to recover it.
Vine is the video sharing service acquired by twitter, with vine you can share your favorite videos with friends and family.
If you would like to delete your vine account here are instructions:
Uninstall vine app from your device.
Vine, unfortunately, doesn’t provide tools to download your content easily so it might be a good idea to save your own Vine videos to a computer prior to deleting your account.

How to deactivate your Vine account

To deactivate your Vine account, you must use the mobile app for iOS, Android or Windows devices. You cannot delete an account using Vine’s web interface on a computer.
Option 1: Launch Vine 1.4.4 or later on your iPhone.
Option 2: Tap on Profile at the bottom to go to your own profile page.
Option 3: Choose Settings.
Option 4: Now select Your content.
Option 5: Tap Deactivate account located at the bottom of the page.
“Your profile and content will be hidden shortly after deactivating,” reads the description.
Delete Vine account iPhone screenshot 001
Step 6: To confirm account deletion, tap Deactivate. You can now delete the Vine app from your iPhone.
As stated by the app, your Vine account can be deactivated by logging in within 30 days. After 30 days, your account and data will be deleted permanently. From that point on, Vine cannot recover your account.

Thursday, January 28, 2016

How to remove Topface account


To delete topface account do the following:
1. Login to your topface profile
2. Go to my profile and then click Settings
3. Then under your main info, you will see the link to delete your profile
The direct link to delete your topface profile is:

Remove Instagram Account

Remove Instagram Account

 Image result for How to Delete Instagram Account
If you want to delete your Instagram account, follow the following steps to achieve this:
Delete Instagram Account
  1. Sign in to your Instagram account by entering your username and password and click Log in button.
  2. Locate your username on the top right-hand corner of your browser, and click.
  3. From the drop down links, click “Edit Profile
  4. Locate the link on the page towards the bottom right edge of the settings area, that states “I’d like to delete my account“. Click the link.
  5. Locate and click the drop-down box for the reason why you’d like to delete the account.
  6. Click the reason you want, to select your reason. Most people select “Other“, but if a better reason is already listed, click that link instead.
  7. Click into the “To continue, please re-enter your password” box then enter your account password.
  8. Click the box stating “Permanently delete my account“.
 Or
 Deleting Instagram
A few days ago, I decided that I was going to get rid of my Instagram account, and that’s what I did. I felt that it was just another app that served as a distraction to my daily workflow, so it had to go. Even though I had over 2,000 followers, I was ready to make this change.
Have you ever considered deleting your account? Although deleting an IG account is easy, it’s not as straightforward as just opening the app, going to your account details, and tapping delete. In this post, I’ll show you how to delete your Instagram account.

How to delete your Instagram account

Understand that deleting your IG account is permanent and cannot be undone. Proceed with caution.
Step 1: In a web browser, navigate to the Delete Your Account page. You’ll need to login with your Instagram username and password if you’re not already logged in.

Step 2: Select a reason why you’re deleting your account and verify your password. You will not see the delete button until you choose a reason and re-enter your password.

Step 3: Once you meet the aforementioned requirements, click the Permanently delete my account button to delete your Instagram account.